
Building a Movie Streaming System in the Dorm
Today I have time to introduce last month's achievement - building a dorm movie streaming system. There's a large monitor in the dorm, and at night with lights off, connected to Bluetooth subwoofers, everyone sits together watching a movie - such a wonderful experience~ There's a stand on the bed, using iPad connected to AirPods, pulling blackout curtains at night to enjoy a movie alone - also a wonderful experience...
After several days of adjustments, this system can accomplish:
- Download BT/PT movie resources offline with extremely low power consumption (no need to turn on computers).
- Transfer movies to all devices connected to the system at extremely high speeds.
Origin Story
The story starts with a major event in the financial world from long ago... not that long ago. Recently, Bitcoin crashed, causing many crypto mining bosses to encounter "mining disasters." High-performance equipment used for mining flowed into second-hand markets at extremely low prices. So I took the opportunity to get a high-performance router - this new wifi 3. When I received it, OpenWrt firmware was already flashed, saving lots of trouble. (Otherwise most of this article would be about flashing OpenWrt)
Plus I happened to have an SSD on hand, plugged it into the router, and a simple LAN NAS was built.
STEP1 Connect to Campus Network and Bridge
Our dorm once due to youthful ignorance purchased SUSTech's broadband. In fact, this telecom-provided broadband isn't much better than campus-wide wireless networks (still high-ping warriors). This construction(?), first thing to abandon was this broadband.
If using wireless network cards to bridge school WiFi, it would cause all related properties of that network card to lose half their capabilities. Fortunately, this router has dual network cards - I used one to connect to school's SUSTC-Wifi, the other to generate a wireless LAN.
My dorm also has several smart devices (smart AC plugs and smart desk lamps), so I created a dedicated network for them.
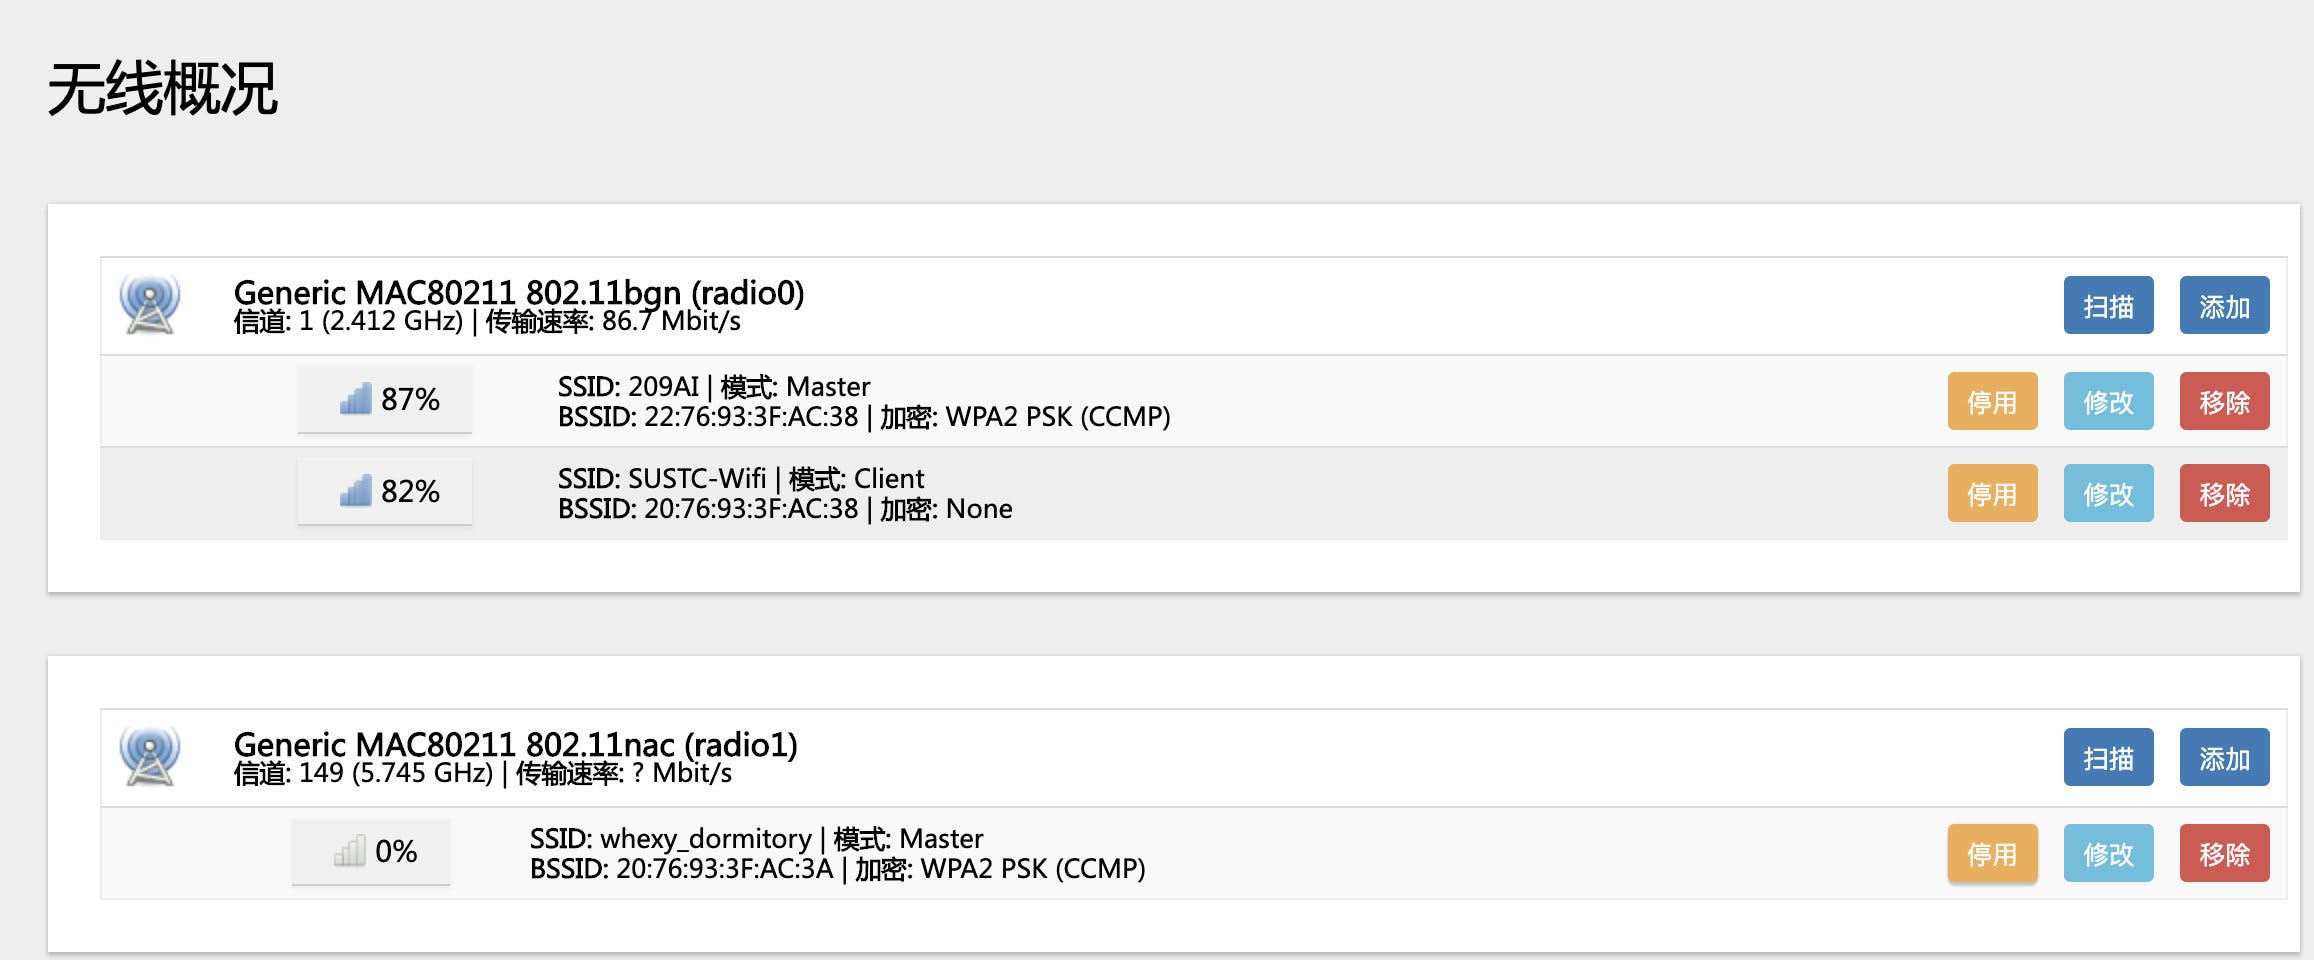
Suggestion: Client mode connects to WiFi, AP mode broadcasts signals. This configuration is simplest.
STEP2 Disk Mounting and Mapping
This step is quite simple - plug in the hard drive and set up mounting.
The router has OpenWRT's web manager LuCI installed (just the middle 'u' is lowercase - I always thought it was 'lucl', didn't realize it was actually 'luci'), just configure it casually.
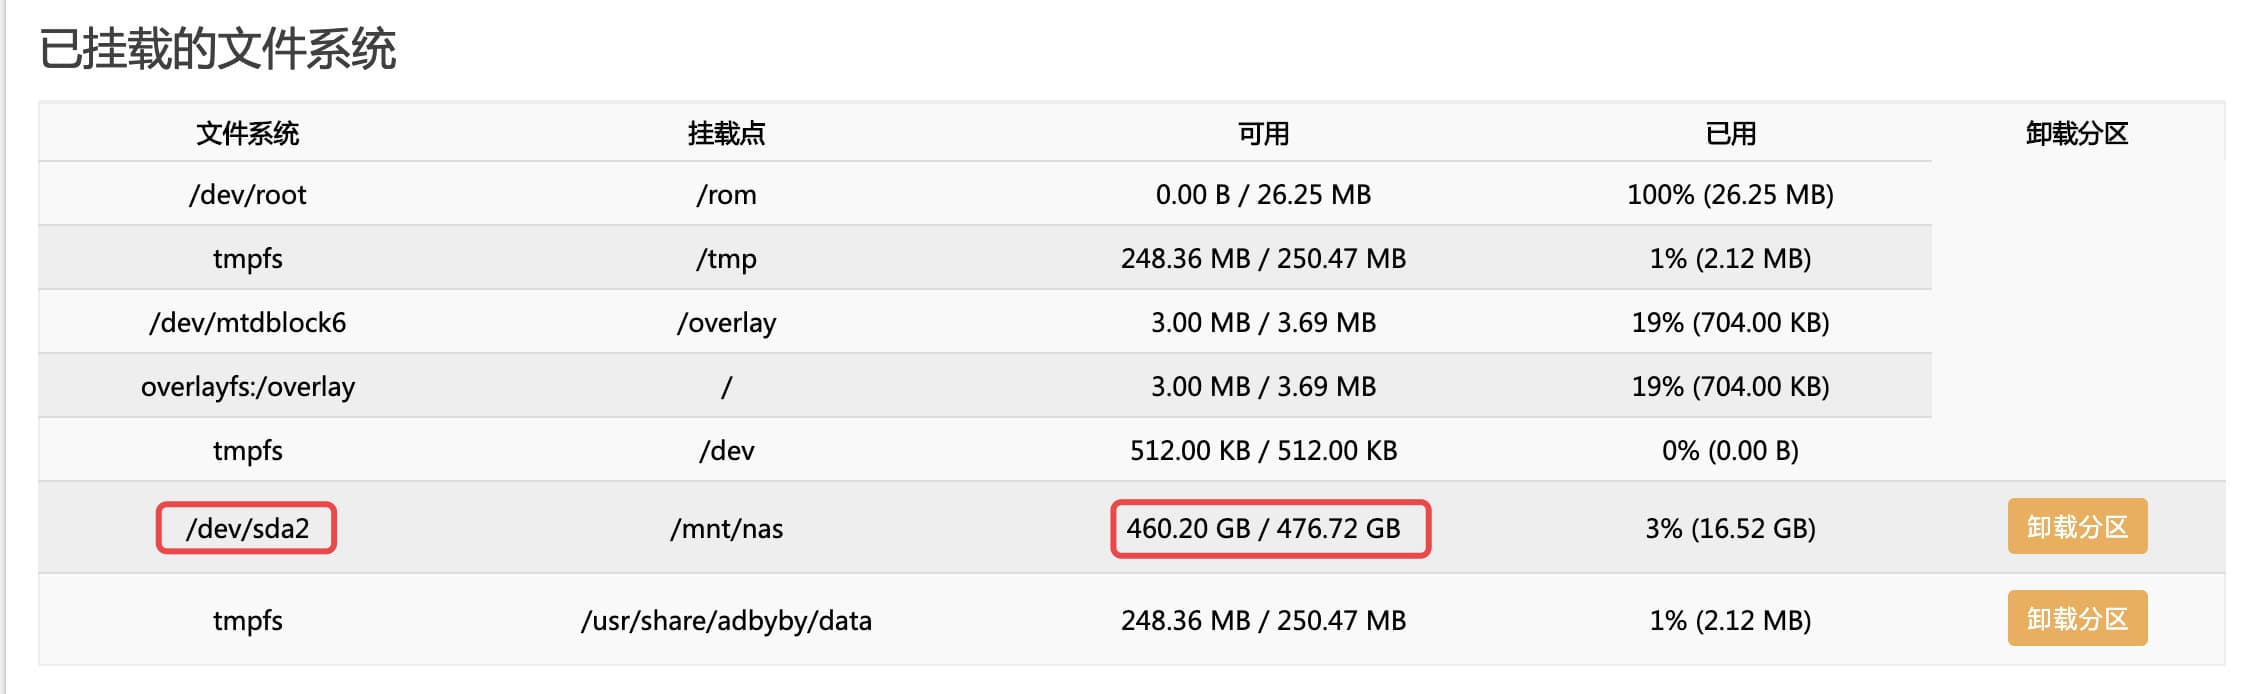
A 500G hard drive can still store quite a lot.
Suggestion: When mounting, consider partitioning and leaving a section for building Time Machine servers. Will write about this aspect when I have time.
STEP3 Configure SMB Service
The system can recognize our disk, but that's not enough - we need to let other devices on the LAN access the disk. At this time, we need to choose a network file sharing protocol.
Definitely not using ftp - whoever uses it is an idiot🤬
Fortunately, OpenWrt firmware includes SMB service. SMB is also the service most easily used as folders directly in macOS Finder and Windows networks. Also, SMB is finally supported by iOS 13 and iPadOS!
When building SMB, consider whether to add username/password authentication. If needed, ssh to the router and manually add user groups and passwords via command line. If you find it troublesome, just enable guest access~ But subsequent security isn't guaranteed.
STEP4 Configure Aria2/Transmission Service
Both Aria2 and Transmission are excellent network download services. I recommend Aria2 more for its many extension support. But recently I switched to Transmission because it gives the illusion of faster downloads...
Remember to configure slightly - don't let download services download resources to the router's already cramped flash storage, which would cause ROM remaining space to be too small, forcing the system to become read-only, making router configurations unchangeable (don't ask how I know this).
STEP5 Enjoy
It's built - wasn't it simple? (Not really)
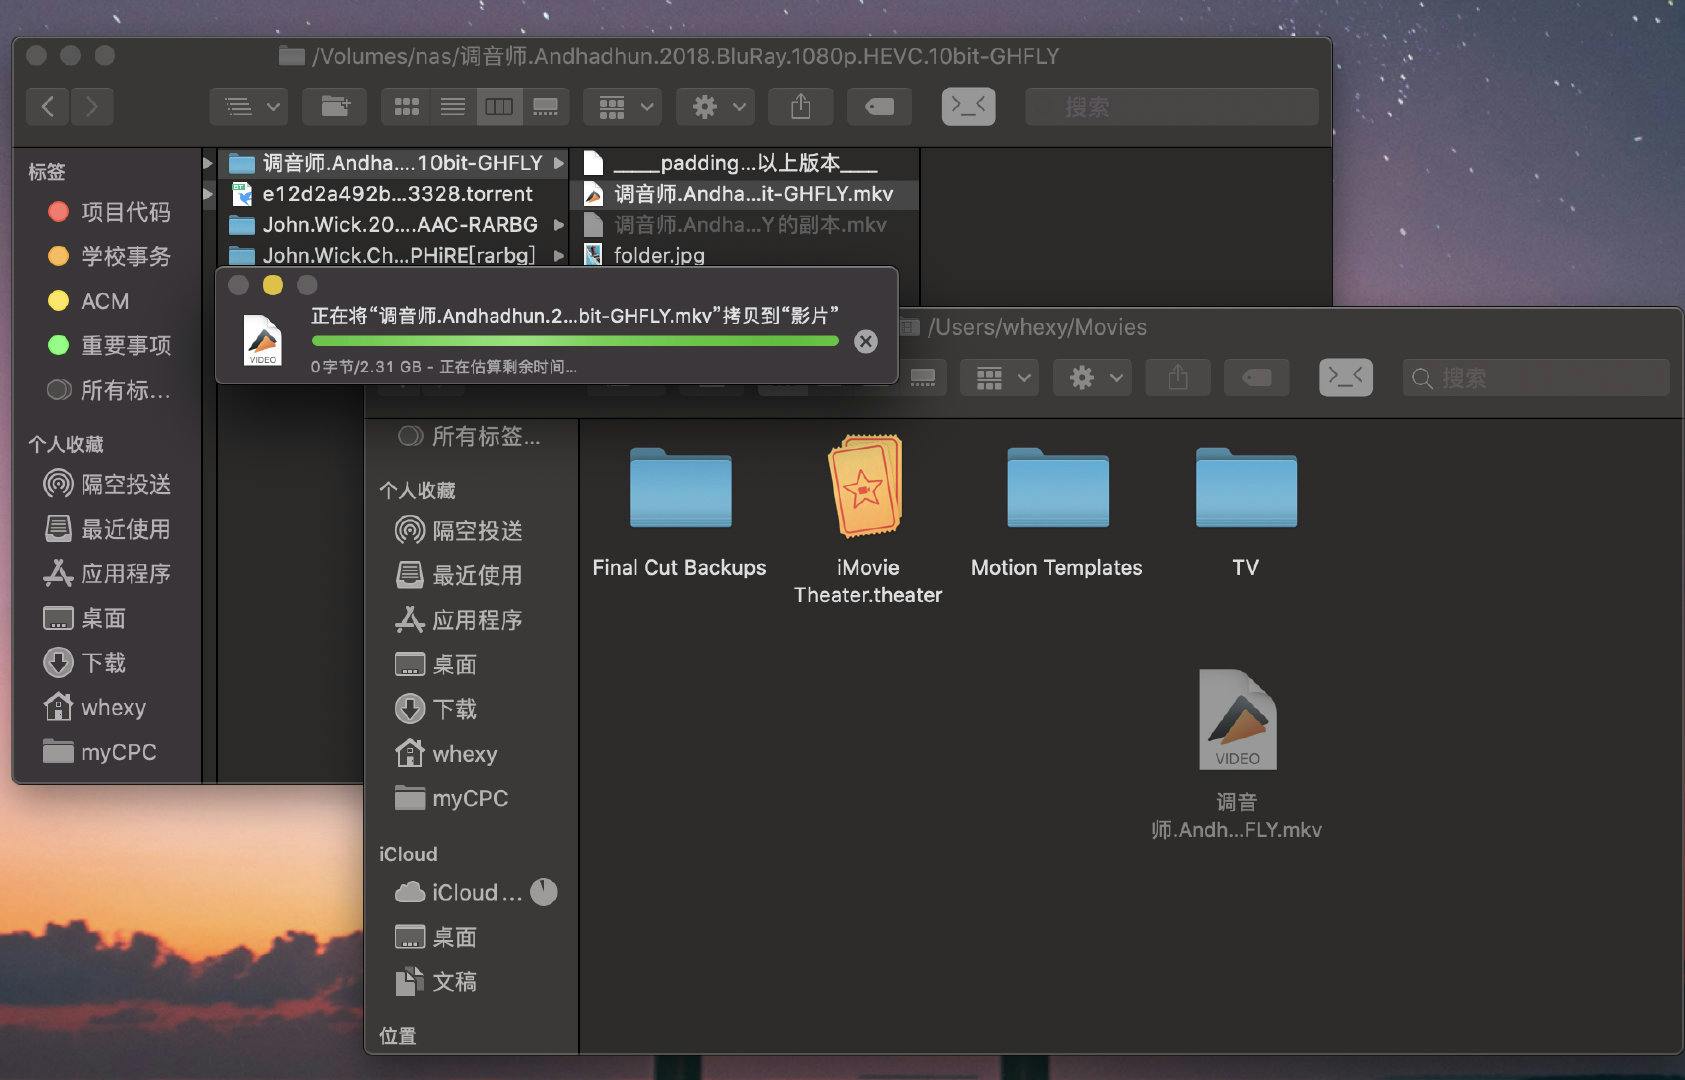
Using Mac to watch movies, you can use Command+K in Finder and input the smb service address, as shown below:
Using iPad to watch movies, (iPadOS) you can select "Connect to Server" in "Files" to connect to smb service.
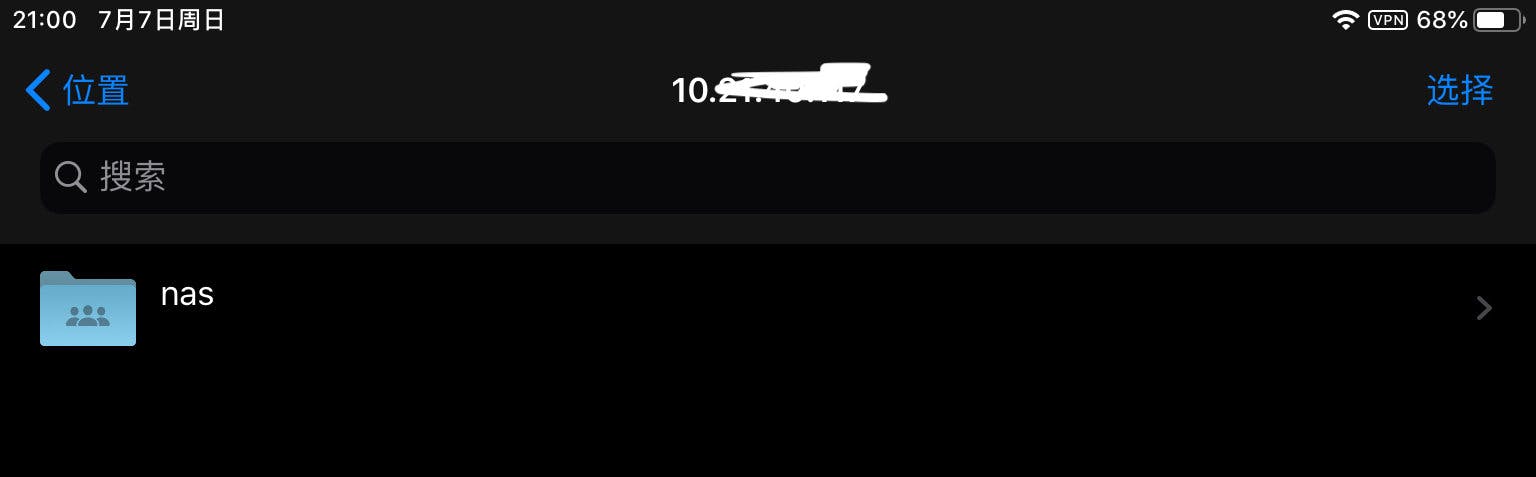
For iPads not updated to iPadOS, I recommend using a video player called VLC that can directly connect to SMB service. updating to iPadOS - it's really useful.
[Optional] More Possibilities...
Port Forwarding
After the above configuration, you can still only enjoy this system within the dorm. But I... like watching movies in other parts of campus(??). At this time, you need to forward ports used by SMB. Required ports can be found through Google search. If you also want to remotely monitor download progress, you can also forward lan's port 80.
When connected to SUSTC Wifi, you can find the dorm's current IP through school's network CAS login records, using this IP to replace the original 192.168.1.1. When writing this article, I was in the library taking all screenshots for this post. This is all thanks to port forwarding.
Frp Internal Network Penetration
After the above configuration, you can still only enjoy this system within the school. But... what if you want to access it off-campus?
🌚 First, I don't recommend off-campus access to this service. For external network transmission, the school has speed limits. Network speed is a major drag. Second, are you sure you don't want to spend good time off-campus eating, chatting, and playing with girls? Why don't you go to movie theaters??
Well, Well, All right, let's assume you not only want to watch movies with girls but also want to show off your system... This is when Frp internal network penetration comes in handy. Frp is a service that forwards traffic through third-party servers. You need to purchase your own servers. Then install Frp sender on internal networks and deploy Frp forwarding externally.
For Frp configuration, you can research yourself - OpenWrt still provides simple auxiliary setup pages. I still recommend everyone go to movie theaters, otherwise you might win face but lose life.
Random Tinkering: What's Next
Having a router makes life a bit brighter(?). This blog will gradually update on how to use routers so external networks (like mobile 4G, or printing from home remotely) can also use school's Lianchuang printing system, access school's OJ system, and access physics open experiment systems.
There will also be an article briefly introducing using another disk partition to build automatic Time Machine backup. When you return to the dorm, your Mac can automatically backup - the process is completely painless.
© LICENSED UNDER CC BY-NC-SA 4.0